Pattern Analysis Vogue 1859, Part 7

Success or Fail?

It is finished. Beautifully finished, actually. But it is a FAIL.

Of course, this was a trial run with ugly fabric just to check the pattern. The fabric type and weight were suitable for this design. So the ugly fabric didn’t cause this fail. This fail is due to the pattern drafting.

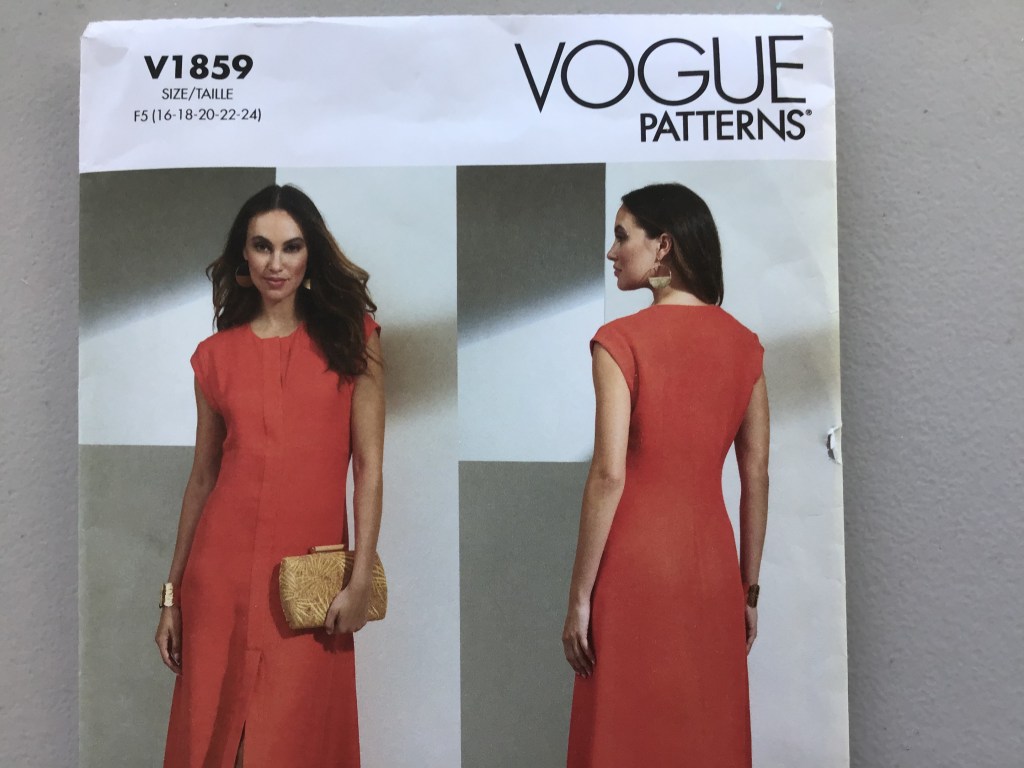
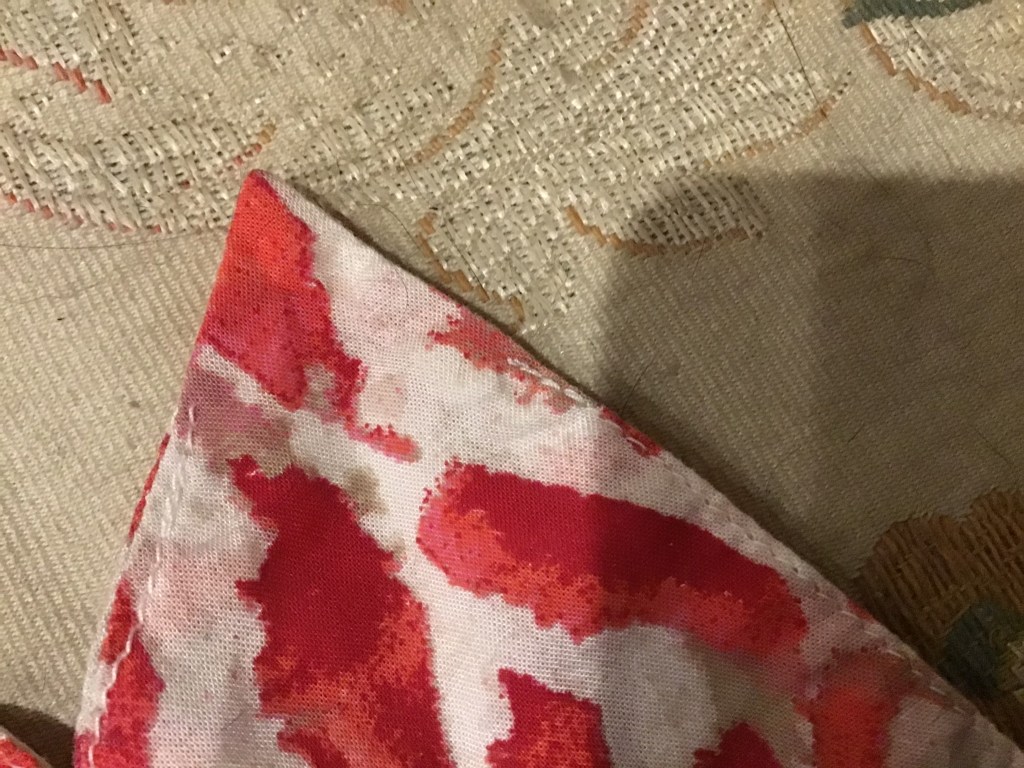
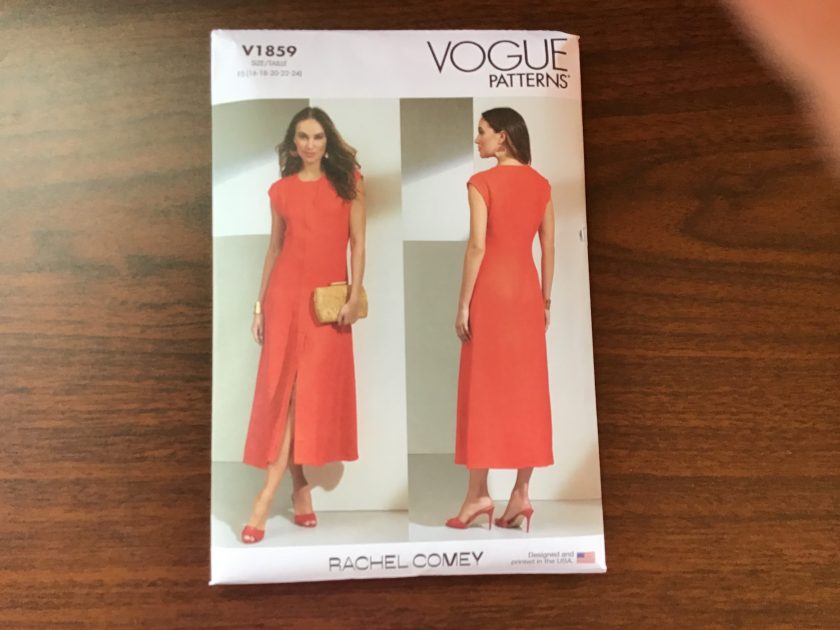
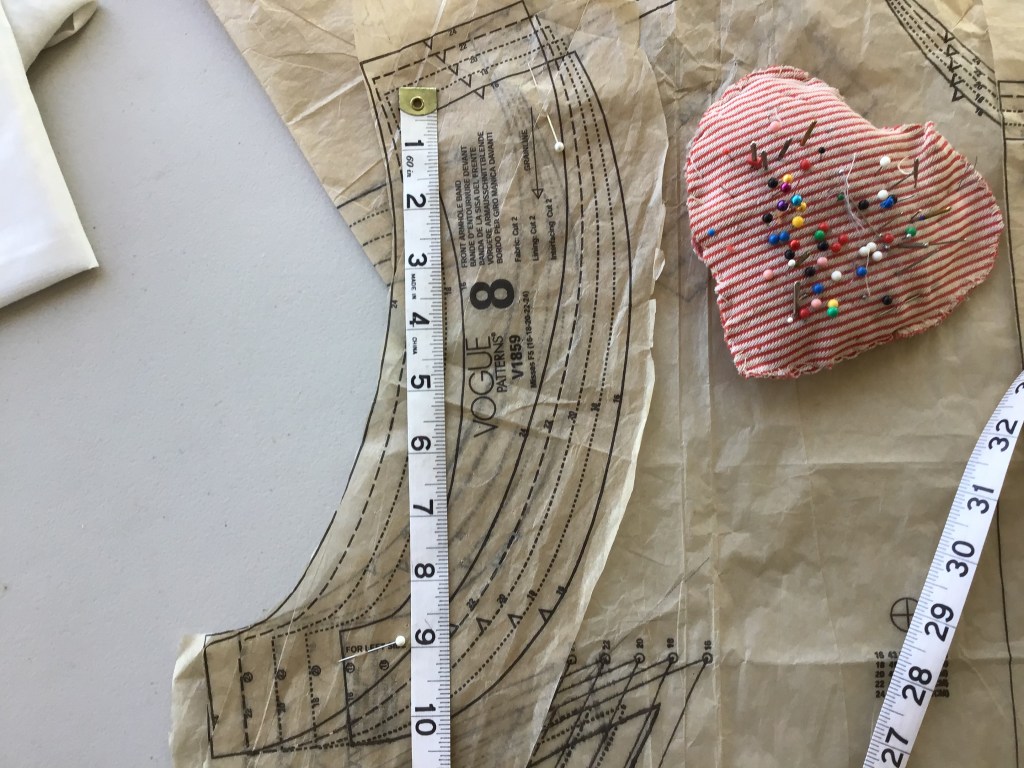
The gaping under the arms is huge in real life, about three inches too low. The pattern envelope photo is posed in such a way to hide this fact. I can only guess at the number of hidden clips used in the photo shoot. I made a size 22, and the armhole depth finished about 9 1/2 inches deep. Nope. Way too deep.


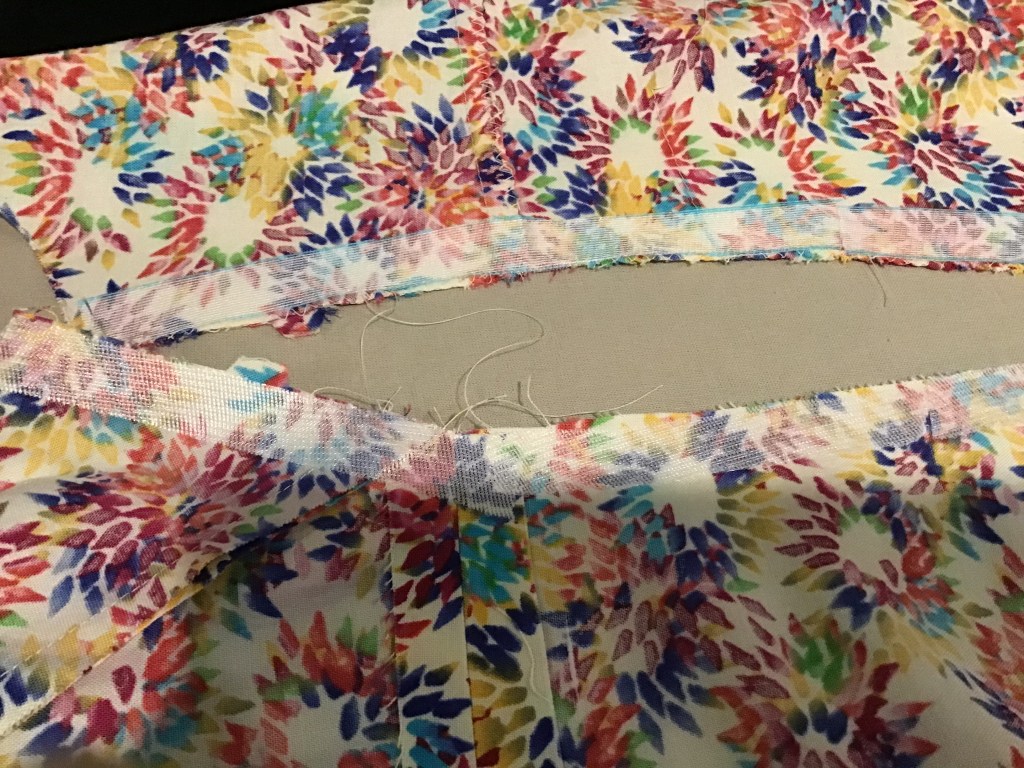
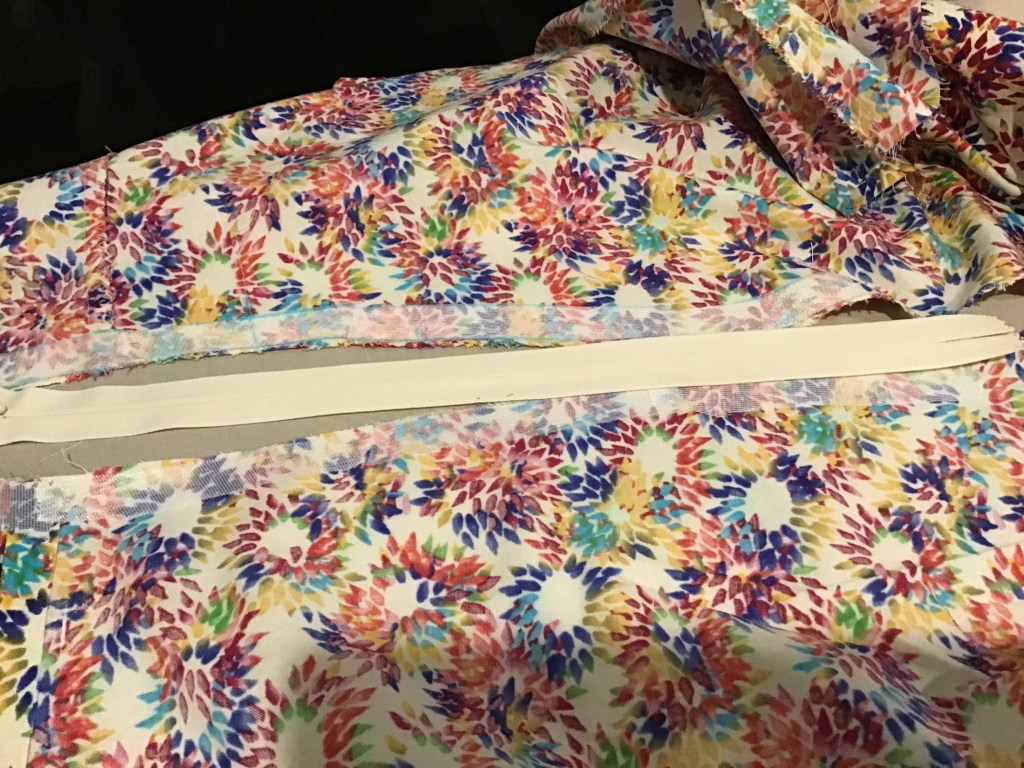
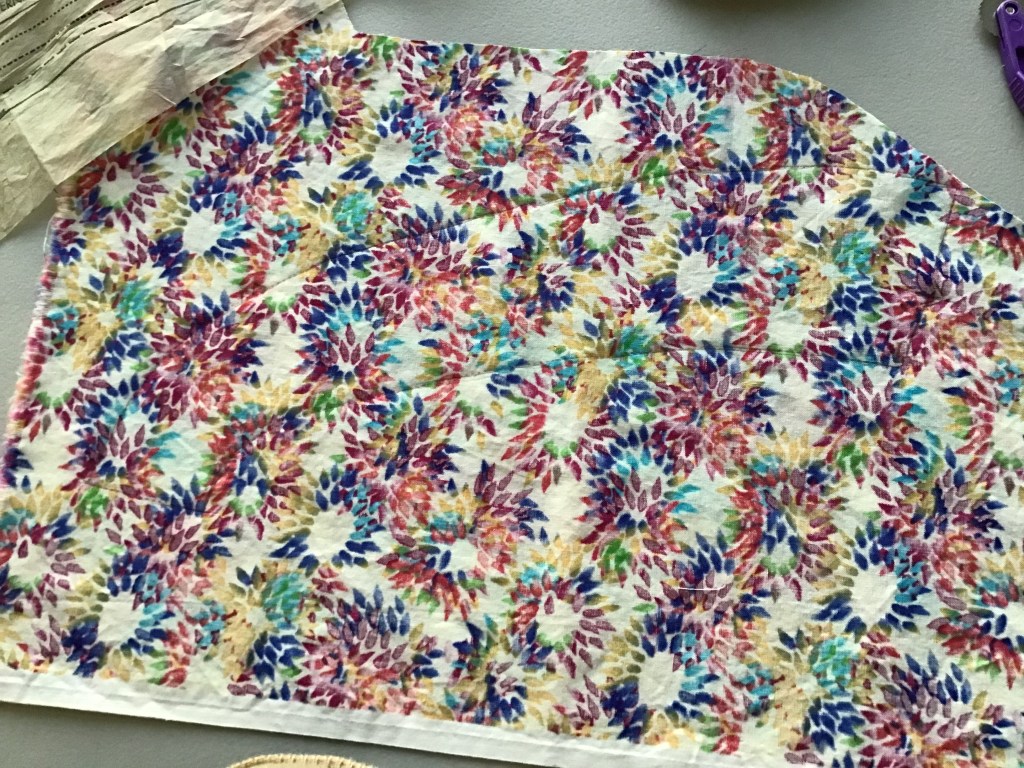
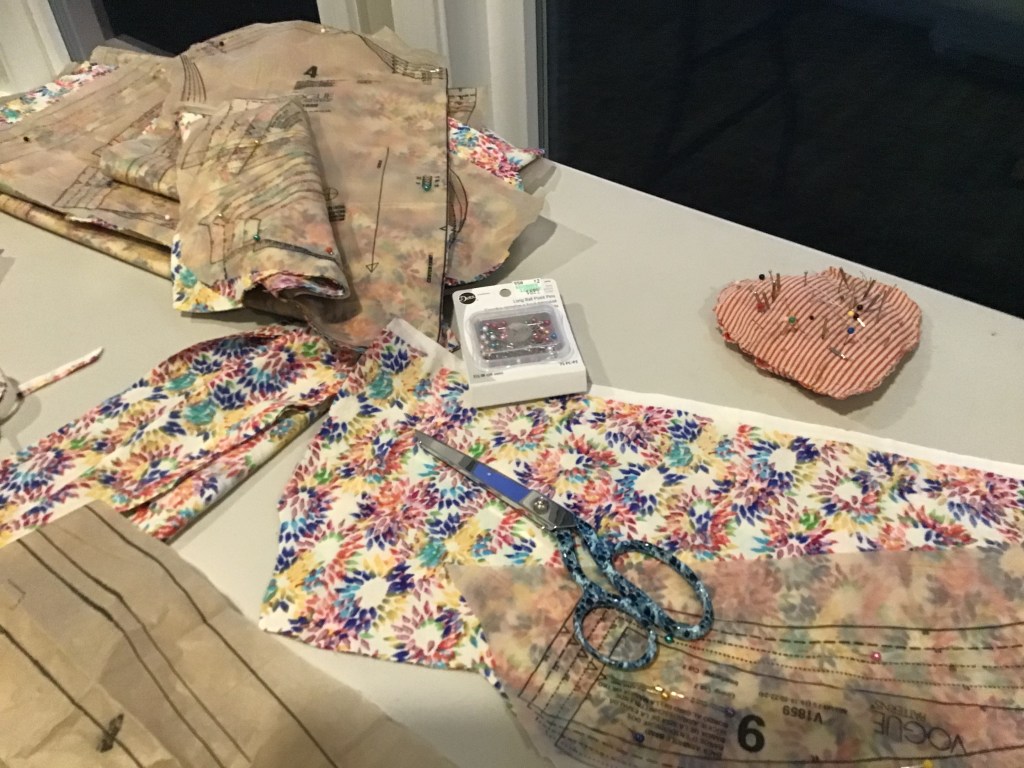
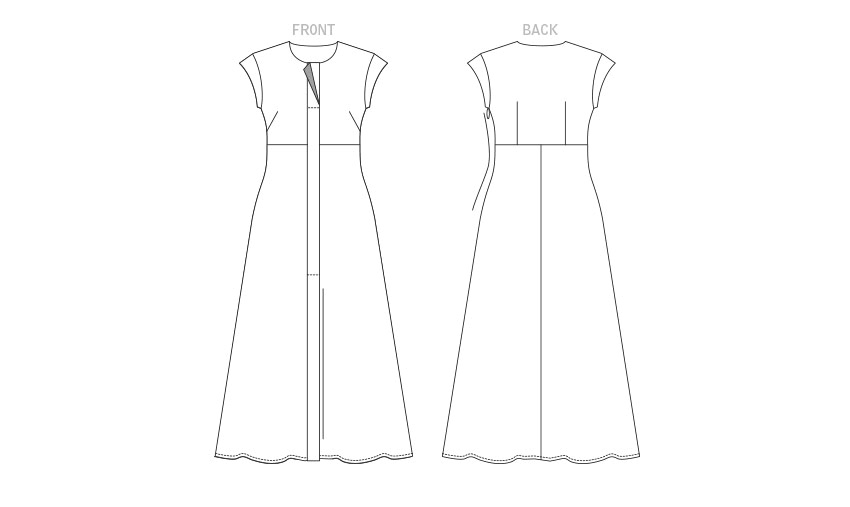
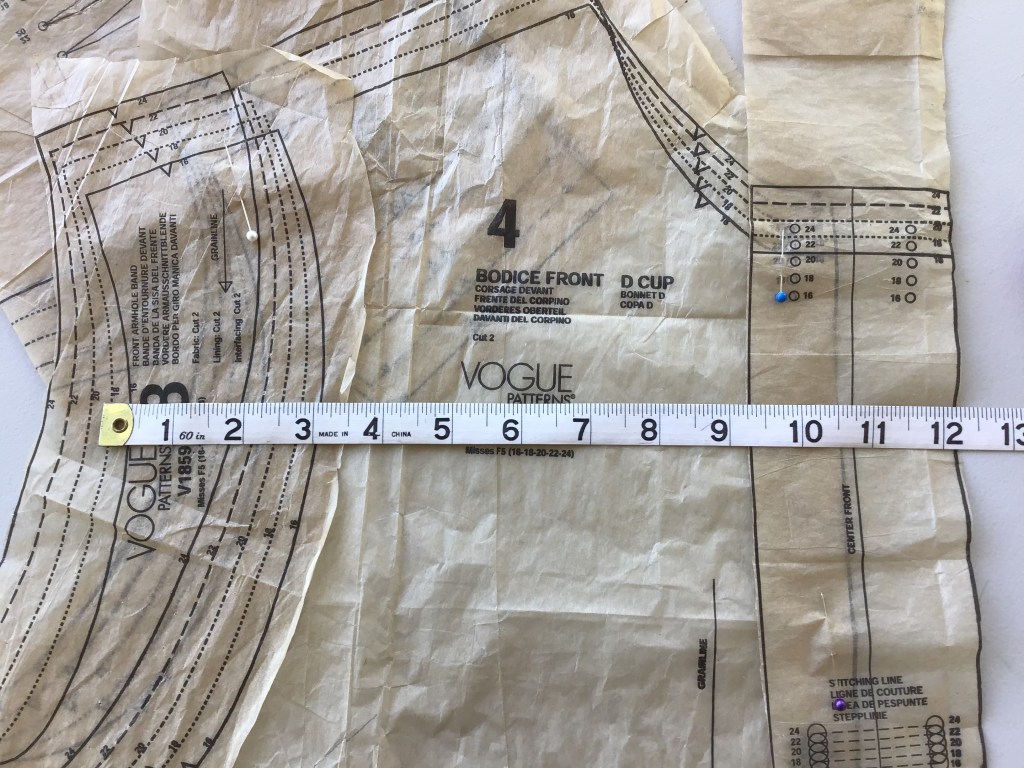
Then there is the issue of the massive width of the front bodice above the breast line. In the next photo I have assembled the bodice pieces for your viewing pleasure. Note that this is for only one side, so the total width of the front bodies is about 23 inches! The back bodice width is good.


The shoulders are too wide. I would need to reduce this by an inch.
The fit at the bustline is good, but it is pretty slim through the waistline. The finished length hits me right above the ankle, and I am pretty close to six feet tall.

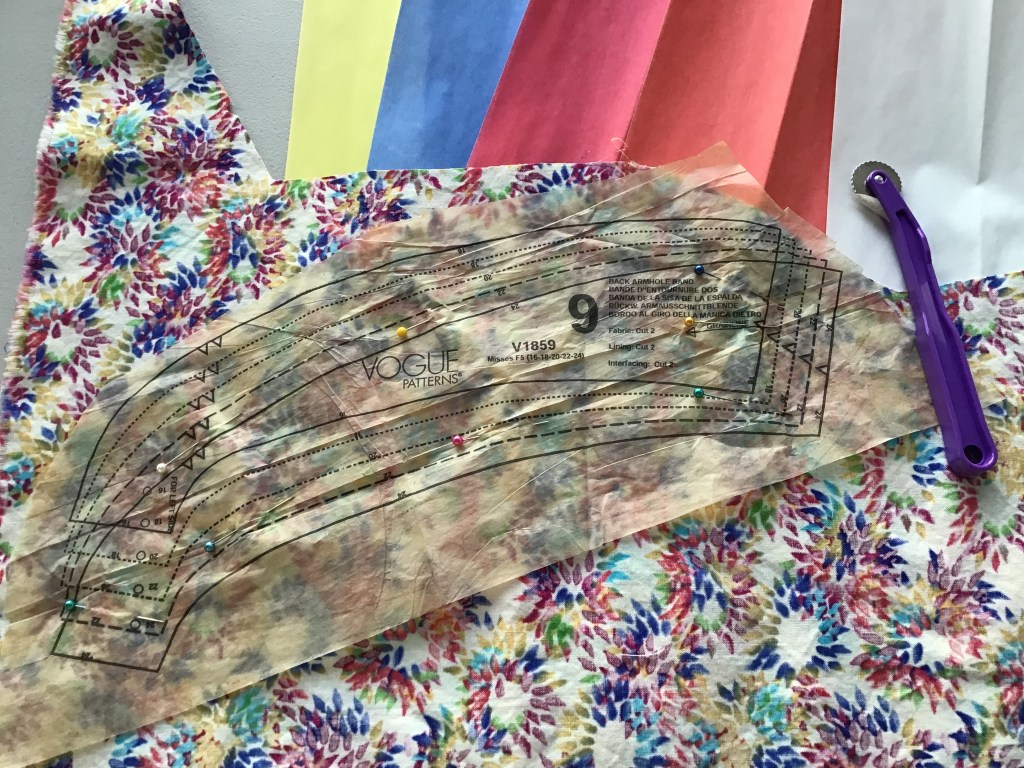
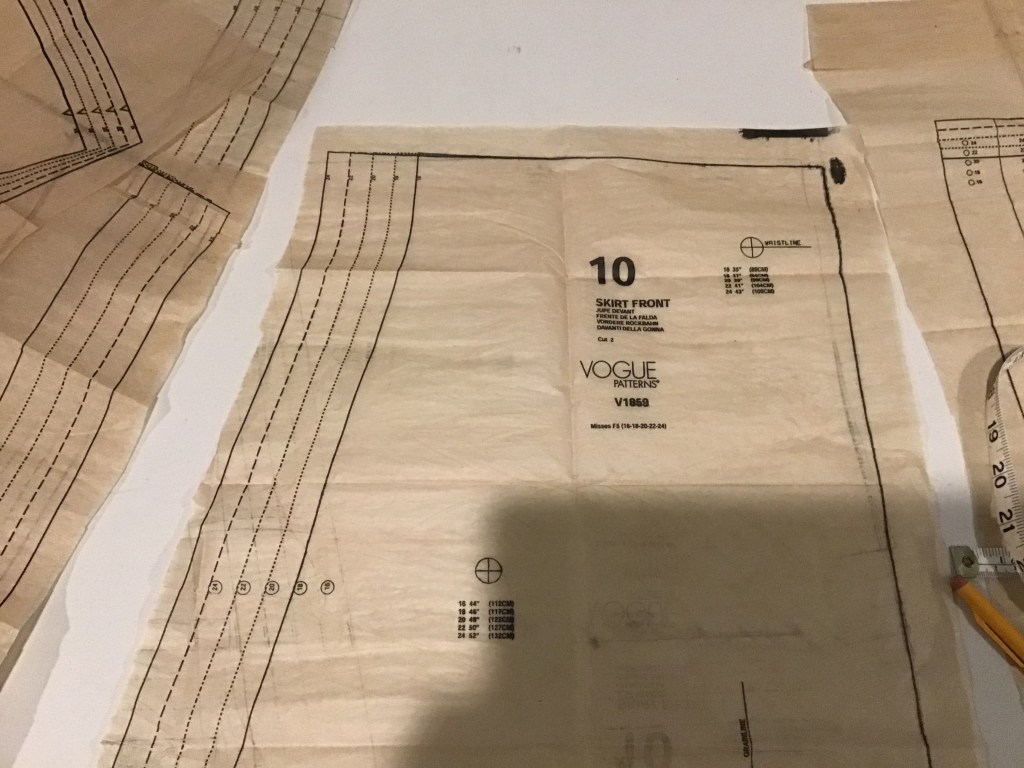
If I decide to have another go at this design I will definitely trace off the bodice front, back, front band, and arm bands. I still like the style of this dress, so I might do it.

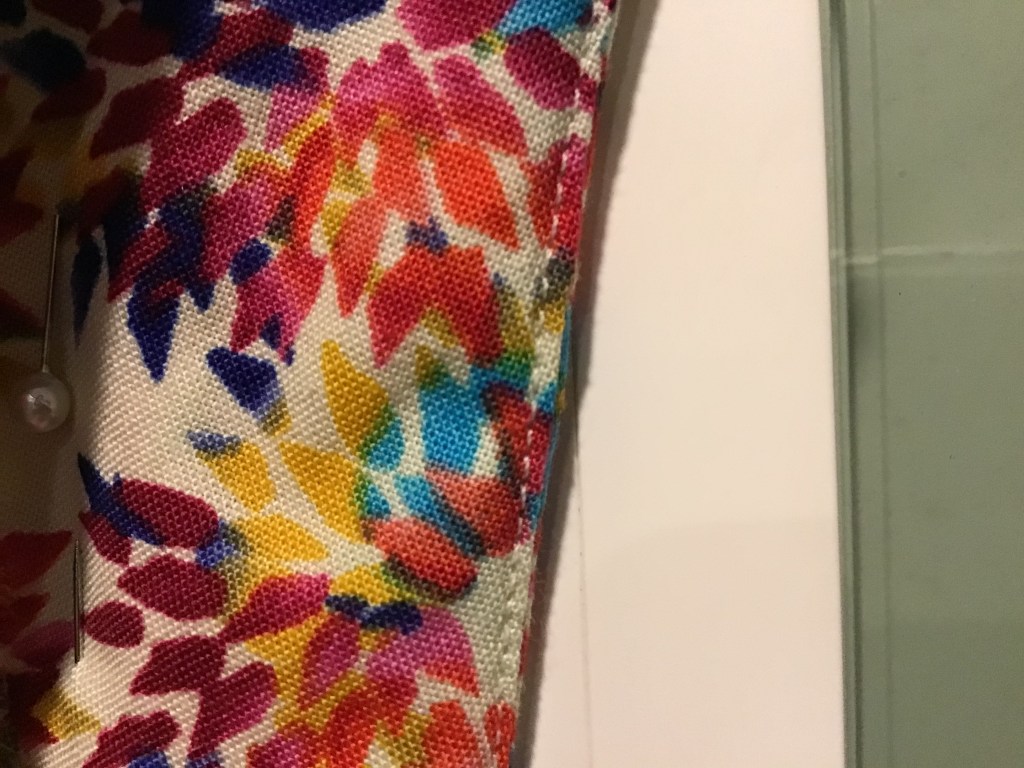
And lastly I want to mention the pattern instructions for assembling and stitching the front bands. They are crap. No diagram, just a couple of sentences suggesting to put it together on the inside while pinning on the outside. Craziness. If you’ve been sewing for fifty years you can work it out. Goodness help you otherwise.

Pattern Analysis Vogue 1859, Part 6

I was a bit surprised that the pattern instructions for Vogue 1859 didn’t recommend interfacing the seam allowances prior to inserting the zipper. This step stabilizes the seam and results in a much easier zipper application, especially in a seam that is curved. It eliminates those aggravating ripples and gives a nice professional finish for any type of zipper. It is super easy to apply, especially if you use fusible interfacing. I cut straight strips 3/4 inch wide and add an inch to the length of the zipper I am inserting. These strips were cut 15 inches long. I consider this step as essential for knit fabrics.

I also press my zipper completely flat.

There’s an invisible zipper in this seam!


The only thing left to do on this project is hemming.

Thanks for stopping by!

Sewing Magic

I only had a sliver of actual sewing time today, but getting a few things done feels good. One armband and lining are now attached to the bodice. I made the decision to finish the seams of Vogue 1859 with a zigzag stitch instead of Hong Kong binding.

I priced ready made double fold bias binding at Hobby Lobby, and the cost for this project came to about $8.00 US. I decided to pass, since my project is a trial run of the pattern. I still have plenty of this wild print yardage to make my own bias binding but again, trial garment. I have my eye on another Vogue pattern to use up the remaining fabric.

Today I want to write about understitching. Here’s an example from my current project:

Understitching is underrated. Even though it is recommended by pattern sheet instructions, sewing books, and magazine articles it is oftentimes skipped during garment construction. It is viewed as a pointless waste of time and thread and therefore totally unnecessary.

But once you understitch a facing, the magic happens! The seam rolls effortlessly in the correct direction and lies smoothly on the interior or underside of the garment. It simply behaves in a way that no amount of pressing, pulling, or ironing can achieve on its own. In the photo above you can see how beautifully the armband seam has rolled to the inside of the garment. I took this photo before I pressed the seam.

Here is a photo of a RTW garment collar from my closet. This is the right side of the collar:


And here is a picture of the understitching on the reverse side. Notice that the seam was understitched as far as possible into the corner.


Sewing factories use understitching during garment construction to achieve control of fabric and beautiful finishes. So can we!

Sewing Magic!

Pattern Analysis Vogue 1859, Part 5

Hideous. Just hideous. See for yourself.

The hanger shot. Should I say more?

I chose this fabric because I have tons of it and it is too hideous to wear. That made it perfect for a trial run of Vogue 1859. So actually, this is working out quite nicely. I am pleased so far. This is not fabric I am going to cry over. The goal was to find out what pattern alterations might be needed for the REAL version of this pattern.

I’m almost done. Finish the arm bands, baste in a zipper, decide on a hem length, etc.

I’m picturing a real version in navy blue linen.

More to come. In the meantime, ponder this photo.

I love the pattern sales at Vogue. This latest haul just arrived. Thirty six of them!

Thanks for stopping by. More to come.

Pattern Analysis Vogue 1859, Part 4

A commentator asked a question regarding multi-sized patterns and pattern tissue alterations. In essence, how do you preserve the original pattern?

The best way is to use a tracing wheel and waxed tracing paper to trace the original pattern onto plain paper.

The pattern piece below shows all the different lines indicating four different sizes printed on the tissue. And the rainbow colors of my tracing paper!


All those lines can get confusing pretty fast if you are new to sewing. The trick is to determine which line is your desired size. In the following photo I have determined my size line and I have started transferring the line directly to the fabric. No alterations were needed here; I just needed to transfer the curved shape. This preserves the original pattern.

The traced lines were very faint so I marked over them with a dressmaker marking pen. Much easier to see this line!


I have cut out all my pattern pieces, contrast pieces, lining, and interfacing. Since I am on a roll here, I will transfer all the pattern markings and load a bobbin, too.

Thank you for stopping by! I appreciate your comments and welcome any observations or questions.

Pattern Analysis Vogue 1859, Part 3

Here is my fabric choice for a hopefully wearable muslin of Vogue 1859. A little on the wild side, yes?

There are several reasons I chose this fabric.

One is that I have ten yards of it.

Two is that it is a very nice 100% cotton.

Three is that it was already prewashed and ready to go.

Four is that this fabric screams “SUMMER AT THE BEACH” and will be perfect for going out to eat seafood.

Five is that the wild print includes a large dose of the Pantone Color of the Year, Magenta.

And who doesn’t enjoy the Wild Side every now and then?

So I’ve spent the morning laying out pattern pieces and measuring grain lines. Followed by a lot of pinning.

After pinning down my patterns and making sure everything looks good, I always walk away and take a break. Today that meant I headed to the kitchen and started cooking a pot roast. A little laundry was done, a little housekeeping was done, and a lot of thinking and planning was done.

Every now and then I went back and looked at the fabric. I looked at it, and it looked back at me. It actually smiled a couple of times.

After lunch The Fisherman and I went for a walk. A cat went with us.

The fabric was begging for scissors, so I caved in.


Now to decide what to use for the contrast bands. I have thread, interfacing, and a zipper. Need to locate tracing paper and the tracing wheel so I can transfer the darts.

More to come!

Pattern Analysis Vogue 1859, Part 2

The pattern sheet held an interesting surprise. French dart!

These shaped darts look wonderful on the figure. Very flattering for all figures. This particular pattern for these darts does present a bit of a hazard, though. Since the bulk of the dart is removed when cutting the fabric, only a minimal seam allowance is available for adjustment. In this case, the dart is stitched with a 3/8 inch seam and then bound with bias tape.


The next photo shows the curvature of the dart in addition to the bust point and the finished garment measurement at the bust.


I require a size 22 for this pattern. Yep, I’m a plus size. I’m over it. Numbers don’t matter, but FIT does. So a size 22 it will be.

A Word About Garment Measurements

The finished garment measurements will be DIFFERENT for every pattern, since each pattern is a different style. Each style begins with the standard measurements. Wearing ease is added for comfort on the body. Design ease is added to achieve the style.

Vogue drafts a size 22 with the standard measurements for Bust 44, Waist 37, and Hip 46. The finished garment dimensions on this pattern are Bust 49 1/2, Waist 41, and Hip 50.

Since some patterns are designed with a looser fit, it is entirely possible that occasionally I can move down to a size 18 or 20 in Vogue (and rarely a size 16). That is because of style ease. But I typically find that size 22 works for me.

The distinction between the pattern company’s Standard Measurements and the Finished Garment Measurements can cause much confusion for those just beginning garment construction.

Notice the slight shaping at the top of the skirt. Waistline marking and hip marking along with finished garment measurements are given.


There is a lengthen and shorten line on the skirt, but none is provided for the bodice. Since I am tall, that could present a problem for me. I usually have to lengthen above the waist.

I did a bit of tissue fitting. I like this. I plan to cut a muslin tomorrow. This might work!

Pattern Analysis Vogue 1859, Part 1

Before I start laying out pattern pieces and put scissors to cloth I do a bit of Pattern Analysis.

This process involves several steps, beginning with Why Do I Like This?

This is classy. Classic look, feminine, elegant, and looks wonderful in a solid color. The lines of this would flatter many women, making looking them look long and lean. And it is RED.

This would be a fabulous Little Black Dress!

Here are the line drawings

The line drawings reveal some interesting details. Empire waist, front bands, arm bands, left side seam zipper, and a contrasting fabric on the front neck band. Slit opening in front.

Finished Garment Measurements are not very helpful. The only ones given are the width of the lower edge and the back length from the base of the neck.

The pattern description includes Hong Kong finished seams and a stitched hem. And cup sizes for A, B, C, and D! Recommended fabrics are medium weight cotton, linen, and pique. Contrast fabrics are broadcloth and challis. Fusible interfacing is recommended. Sizes range from 8 to 24. The largest size requires 3 1/4 yards of 45 inch or 2 5/8 yards of 60 inch fabric.

Notions are a 14 inch invisible zipper and three packages of 1/4 inch double fold bias tape.

This pattern requires 1 5/8 yards of contrast fabric. Lining required is 1/2 yard. It also requires 1 5/8 yards of interfacing.

HUH?

There is a lot of mystery here. Why so much bias tape? Why so much contrast fabric? Why so much interfacing? And why so little lining?

After purchasing the pattern (thank you somethingdelightful.com for the pattern sales!) and a study of the cutting layouts and instruction sheets, these questions were answered.

The lining is only used for the armbands. Not for the bodice. That explains the lining question.

The contrast fabric is used for the right front band only, which is three separate pattern pieces.

The interfacing is used for the front and back neck facings, front and back arm bands, and the front bands. The front band pieces are cut on the lengthwise grain so that explains the yardage requirements for interfacing. According to the cutting diagram all of the interfacing will be used up.

The contrast fabric is also cut on the lengthwise grain on a single thickness. A lot of fabric gets wasted here! I will probably cut these pieces on the crosswise grain to save on fabric (depending on the fabric used, of course).

The pattern description of Hong Kong finished seams is the reason for the three packages of bias tape. The pattern instructions and illustrations do NOT demonstrate the Hong Kong finish application: it is referred to as BIND in the basic glossary on the pattern sheet.

Next up: The pattern sheet!

Needlework Project 2023

Consider The Lilies by Heartstring Samplery

This is a major undertaking since I am stitching this sampler one over one on 32 count cream Belfast linen.


This is the ultimate goal!

With a stitch count of 435 x 363, my finished sampler will measure about 13 1/2 by 11 1/2. I’m not setting a projected finish date for this one.

Here’s my thread toss. Beautiful colors, yes?


Other needlework projects on tap for this year are Christmas ornaments and some Quaker smalls. More on those to come!

I have also started playing around with Vogue 1859. I need some pattern adjustments and will throw together a quick muslin to check the results. That’s on the agenda for tomorrow.

Thanks for stopping by. This is going to be a Good Year for needle and thread.

Ready, Set, Go!

I’m glad you are here!

This is launch day for my new longtime planned blog about sewing, quilting, needlework, knitting, and all things needle and thread.

Buckle up for SWAP, Make 9, Capsule Wardrobes, Pattern Hacking, Vintage Sewing, Sewing for Girls, No Frump Zone, Needlework Samplers, Knitting, Fabric Manipulation, Embellishments, TAST, the White Shirt Project, and MORE!

A preview of upcoming posts

Vogue 1859 by designer Rachel Comey


Consider The Lillies by Heartstring Samplery

Our Flag Stands For Freedom quilt kit by Lisa Bongean for Moda